Introduction
Arduino enthusiasts often find themselves in need of LCD displays for their projects. These displays provide vital information and enhance the user interface. To streamline this process, we embarked on a journey to design an Arduino LCD Shield that simplifies LCD integration with a standard Arduino board. By employing a 16x2 LCD with the commonly used 44780 chipset and a 4094 8-Bit Shift Register, we’ve managed to reduce the pin count, making it an efficient solution.
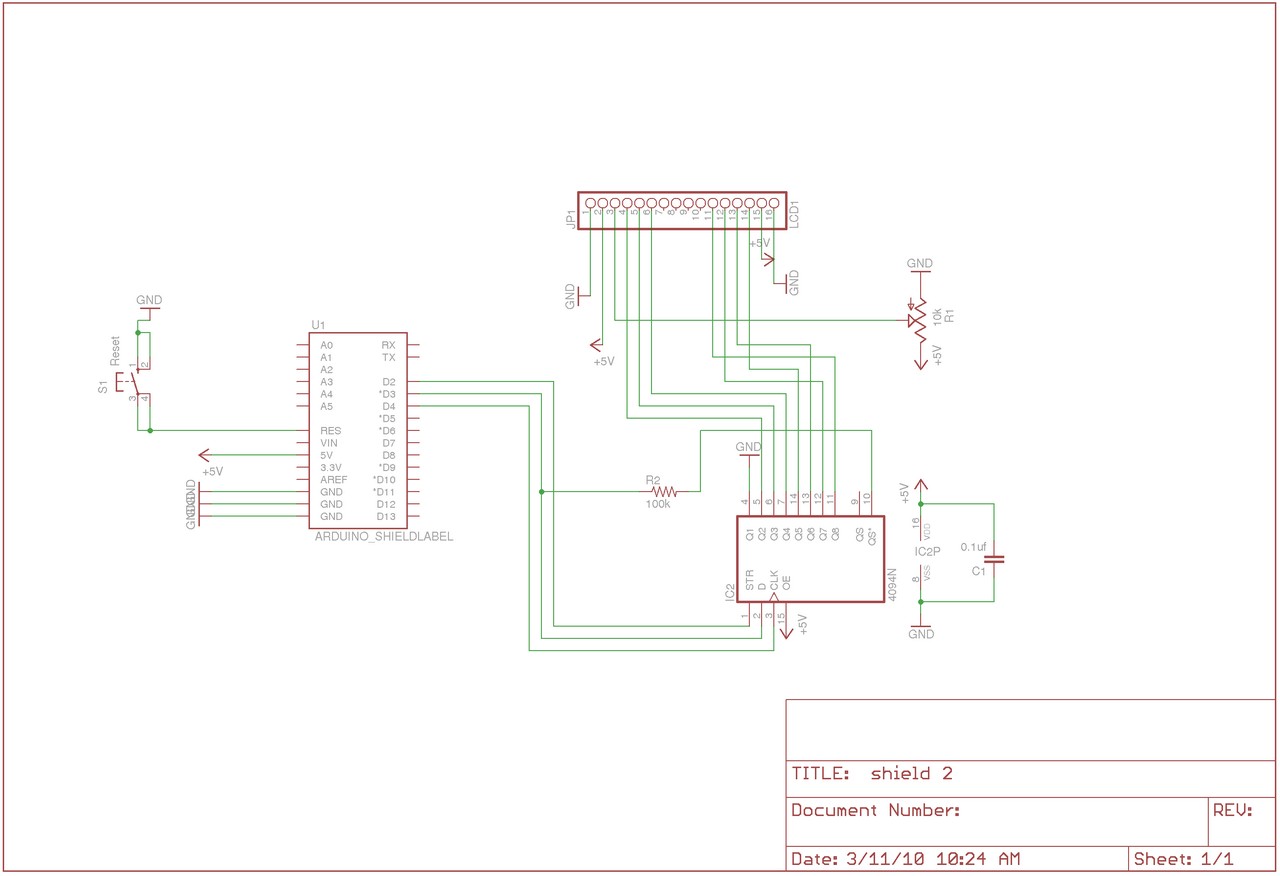
Designing the Circuit
The heart of our Arduino LCD Shield is the 16x2 LCD with the 44780 chipset. To optimize pin usage, we incorporated a 4094 8-Bit Shift Register, enabling us to connect the LCD with just six wires while running it in 4-bit mode. This efficient design reduces the required Arduino pins to a mere three.
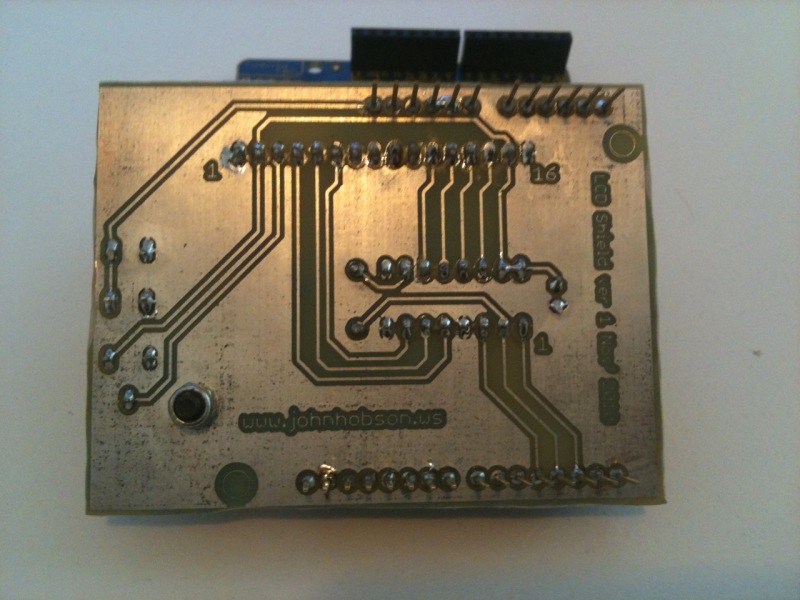
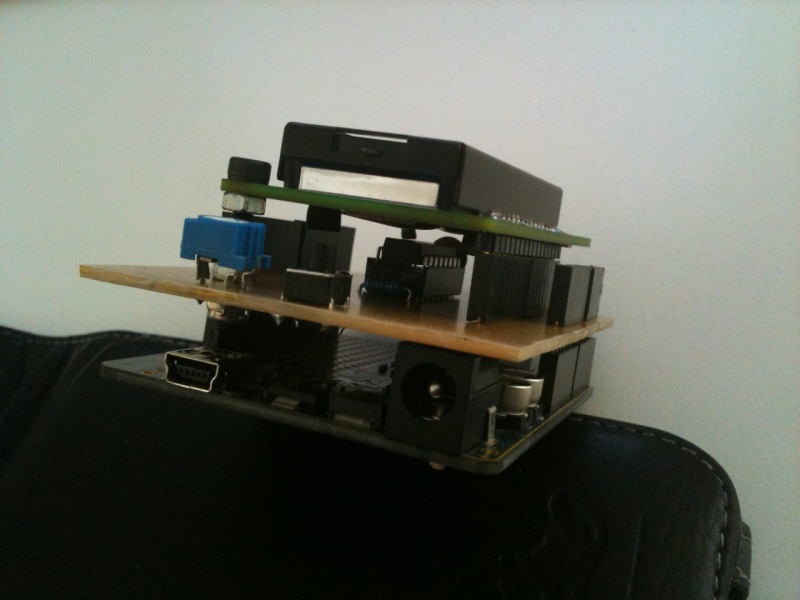
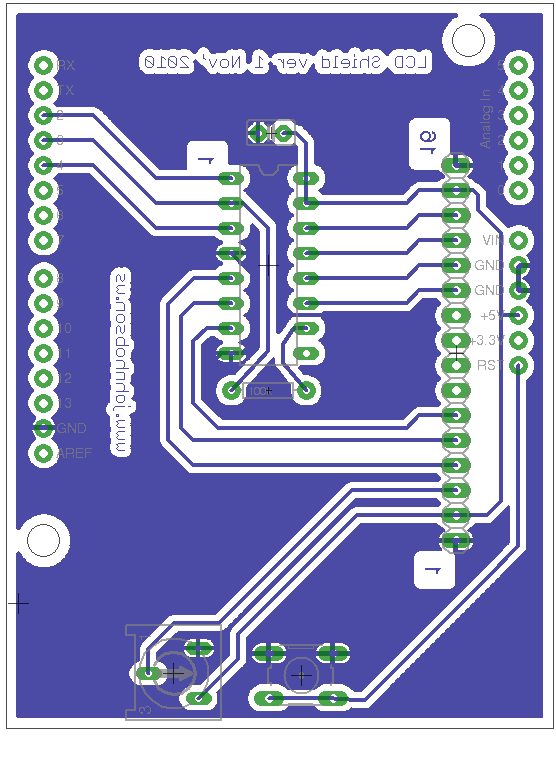
Crafting the Shield
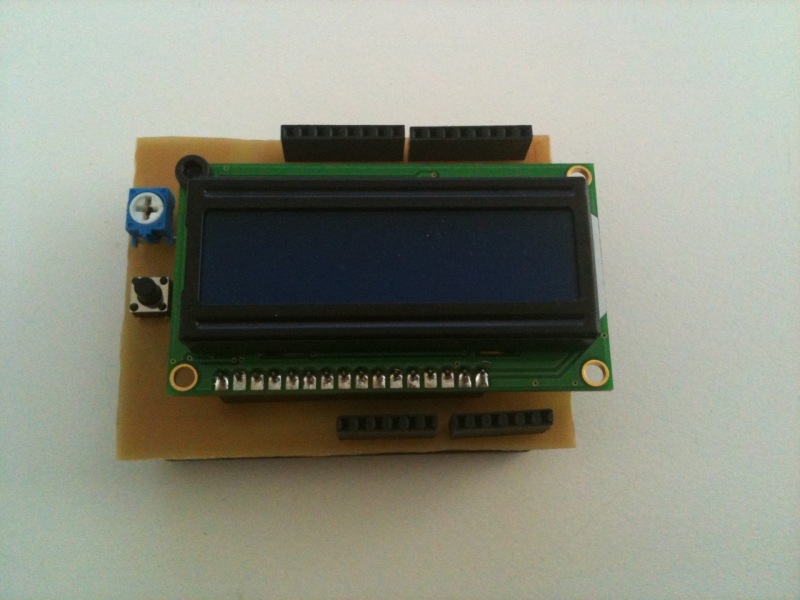
The next step involved translating the circuit design into a functional form. Using Eagle, we meticulously designed a prototype board, which was then etched to create the final product. For user-friendliness, we utilized Arduino stackable headers, simplifying integration into projects. For applications where top-level access is not required, standard male headers suffice. A reset switch was strategically repositioned to the upper level, and a trimpot was added for contrast adjustment on the LCD.
Streamlining the Code
Efficiency extends beyond the hardware in this project. To run the LCD with the Shift Register, we employed the LCD3Wire Library, available on the Arduino playground Here. Loading the LCD3Wire Example code necessitates only minor adjustments to the pinouts, ensuring the seamless operation of the LCD.
Conclusion
Our Arduino LCD Shield represents a compact and efficient solution for projects requiring LCD displays. By reducing the pin count and simplifying integration, we aim to make Arduino-based projects more accessible and user-friendly. With the provided code and circuit design, you can effortlessly incorporate this LCD Shield into your projects and enhance your Arduino experience.
Standard Library Pins
// Arduino pins
#define LCD_LINES 1 // number of lines in your display
#define DOUT_PIN 11 // Dout pin
#define STR_PIN 12 // Strobe pin
#define CLK_PIN 10 // Clock pin
Modified Library Pins
// Arduino pins
#define LCD_LINES 2 // number of lines in your display
#define DOUT_PIN 3 // Dout pin
#define STR_PIN 2 // Strobe pin
#define CLK_PIN 4 // Clock pin
Upload the sketch to your Arduino and you should see the example array streaming through the data. The Board design, schematic, PDF, Images and BOM files can be downloaded From Here in .RAR format.